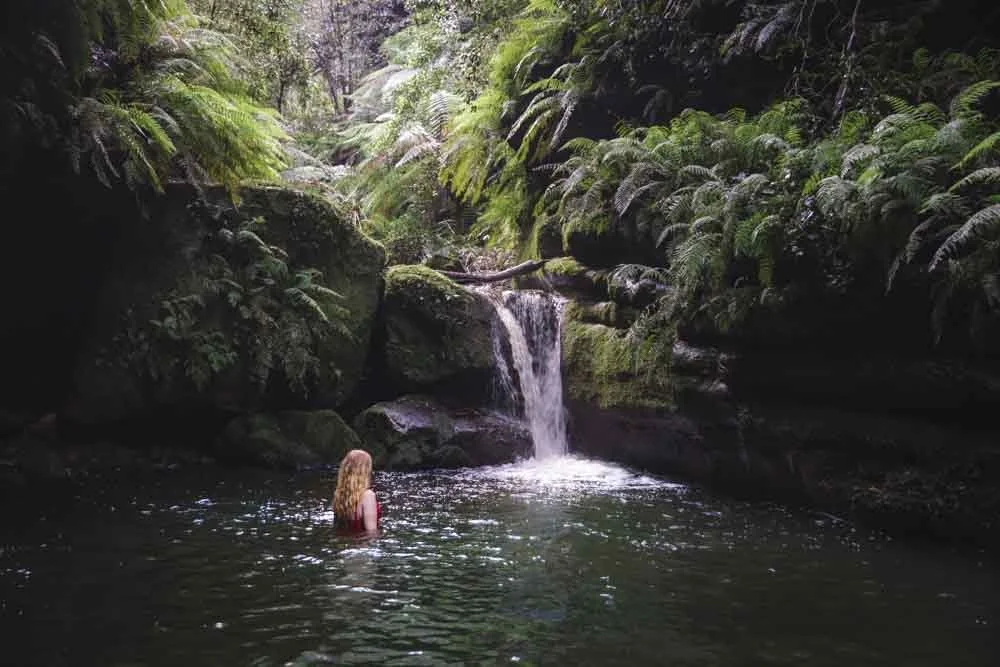
As you enter Colliery Canyon, the walls begin to close in around you. Little light penetrates the canyon floor, creating a dark and mysterious air. The walls are covered in moss and the only sound inside the slot was that of water droplets hitting the small pool at the end of the canyon. Trees with octopus like tentacles grow in crazy formations in the areas where light does reach the cliff walls.
However, I don’t think the vibe would be the same on a sunny day or during a dry spell, this is one where a gloomy day really does add atmosphere.
There are a couple of ways of reaching Colliery Canyon, neither of which are signposted or have a formed trail, so please read all the details below before setting out.
The walk to Colliery Canyon
The stats
Distance: 5.4km return
Elevation gain: 185m
Difficulty: Moderate - hard
Summary: As mentioned in the intro, there are two main ways to get to Colliery Canyon. We opted for the shortest route, but in honesty, having chatted to a friend who used the longer route, I am not sure we chose the best route.
The shortest route (which could be less than the stats shown above as this was our total distance walked, on the return we must have stuck to the path better as it was only 2.55km) is quite difficult to follow and involves negotiating one quite steep descent on a rough track into the canyon below. My understanding of the other route is that the ‘track’ is in better shape, though you do have to cross a landslide near the beginning, which is done using fixed ropes.
Neither route is signposted or has a clear path. I normally feel really confident describing a route here because we take so many notes, but this is one adventure where an offline map is very much required.
I will describe as best as possible what to expect from the route, but it won’t be a turn by turn guide like I would normally do as it’s way too difficult to describe accurately. Having said that, we have taken some coordinates and have details on a few crucial turns that should help make it easier.
If you want to look at the longer loop, you start at these coordinates: -33.5317560, 150.2672226 and go via Kamarah Ridge. This is approximately 4-5km longer than our route.

Starting the trail: into the scrub
The first 2km of the walk are not difficult terrainwise and are largely flat or gently downhill, but the path is very washed out for the majority of the way. At times it is hard to believe there actually is a path.
The scrub is pretty low, so it’s not too bad in terms of getting scratched. I think if the scrub grows it will become much more difficult than it is today in that respect.
From the parking area (details below) you’ll head straight into the scrub you can see directly ahead of you. You can briefly follow the fire trail right instead, but you’ll meet the scrub moments later anyway, so you may as well just get stuck in.

Keep ploughing forwards as best you can, at times there will be a worn path, but at times you’re just walking around the plants.
This first section is a gentle descent and after 180m you will reach a dry creek bed and cross it. There’s a vague trail heading gently uphill to the left, but honestly, you need to keep a close eye on the map because it is really hard to see.


After around 150m there is a short section of very good and obvious trail, but it doesn’t last long. It peters out, though it does return intermittently over the next 1.5km. In essence you want to head in a south westerly direction along the ridge.
There are points where the path lasts for a longer amount of time and it feels a bit more intuitive, but also times when you question if there really is a path at all! Thankfully this section is pretty flat which makes life easier.

The bush is not too overgrown for much of the way and if you find yourself in any section where you are in a big mass of scratchy bush, you have strayed from the path.
After approximately 2km (from the car park) you will reach a rock platform.

The descent
All semblance of a trail disappears here. The ‘path’ is to the left, heading downhill. It’s steep, narrow and vague. Follow it carefully downhill and you will come to a large rock slab. Walk down the slab taking extra care if it’s wet.


The path will head right (south-east) and it gets very hard to follow. We nearly gave up here, so to help we have taken the coordinates of a big rock you need to look out for: -33.5274592, 150.2823370.
Beyond this you are aiming for the opening on to the creek bed, which is at these coordinates: -33.5278153, 150.2825617.

The path is to the right of this rock. We were to the left and the descent looked dodgy. To the right you will see a worn footpad and can follow it right, downhill.

It is narrow and as you get close to the creek it gets loose. You can cut behind a bush at the point where it’s steepest and loosest and it’s beaten down enough to see that this is what most people must do.


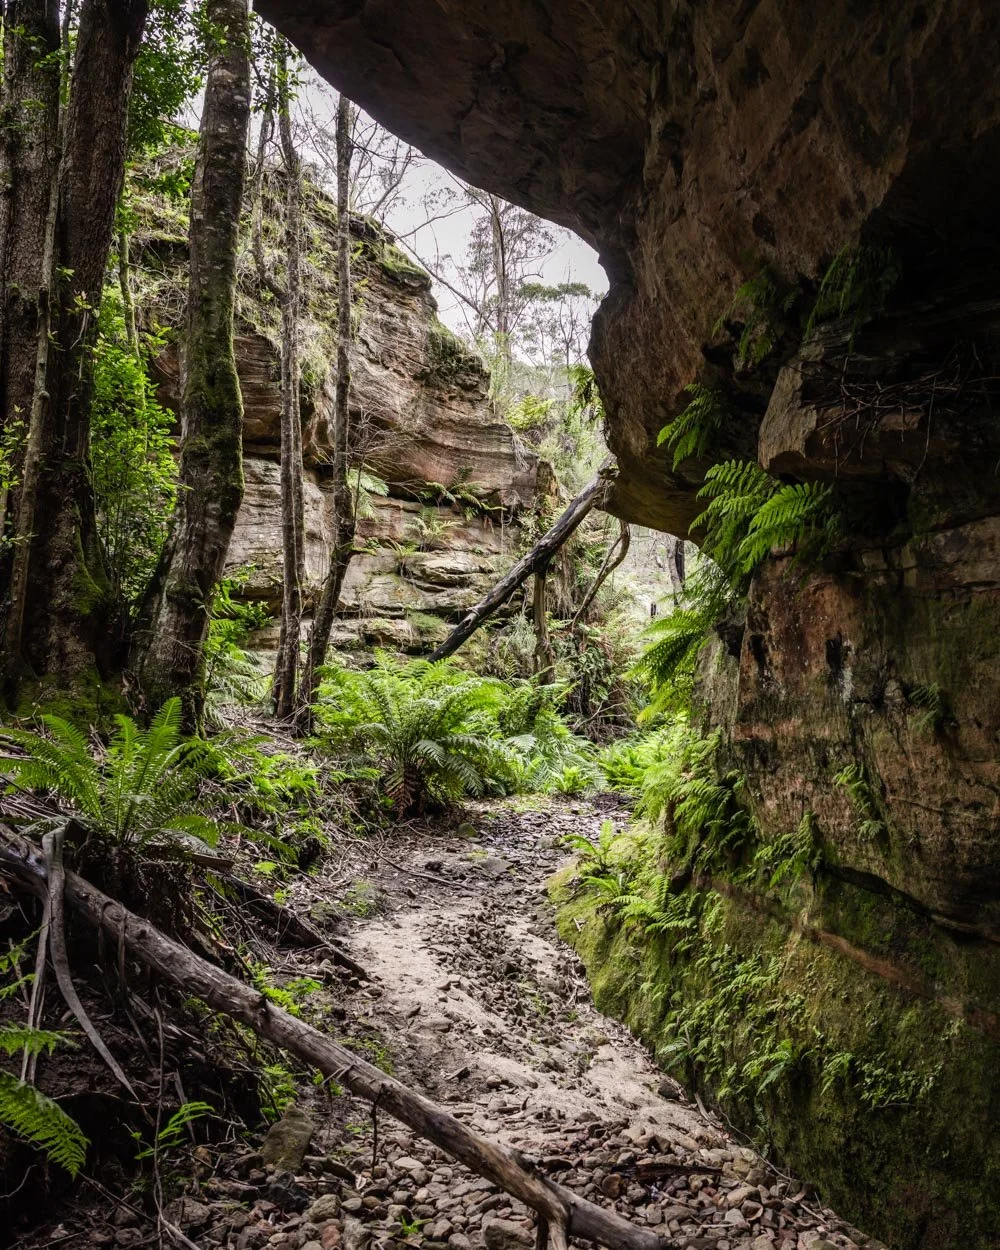
The last few steps are overgrown and ferns cover some dips in the soil. Tread carefully over the debris here and then you will arrive at the dry creek bed. From here the route is easy.

For us the route from the car to this point was around 2.6km. However, we did go wrong several times, so it should be a little less than this (our return leg was only 2.55km total). The end of the canyon is around 300m away from the point you enter the creek bed.
Climbing back up the path is also much easier than going down it in my opinion. However, the scrub section is as hard to follow as it was on the way in.
Entering Colliery Canyon
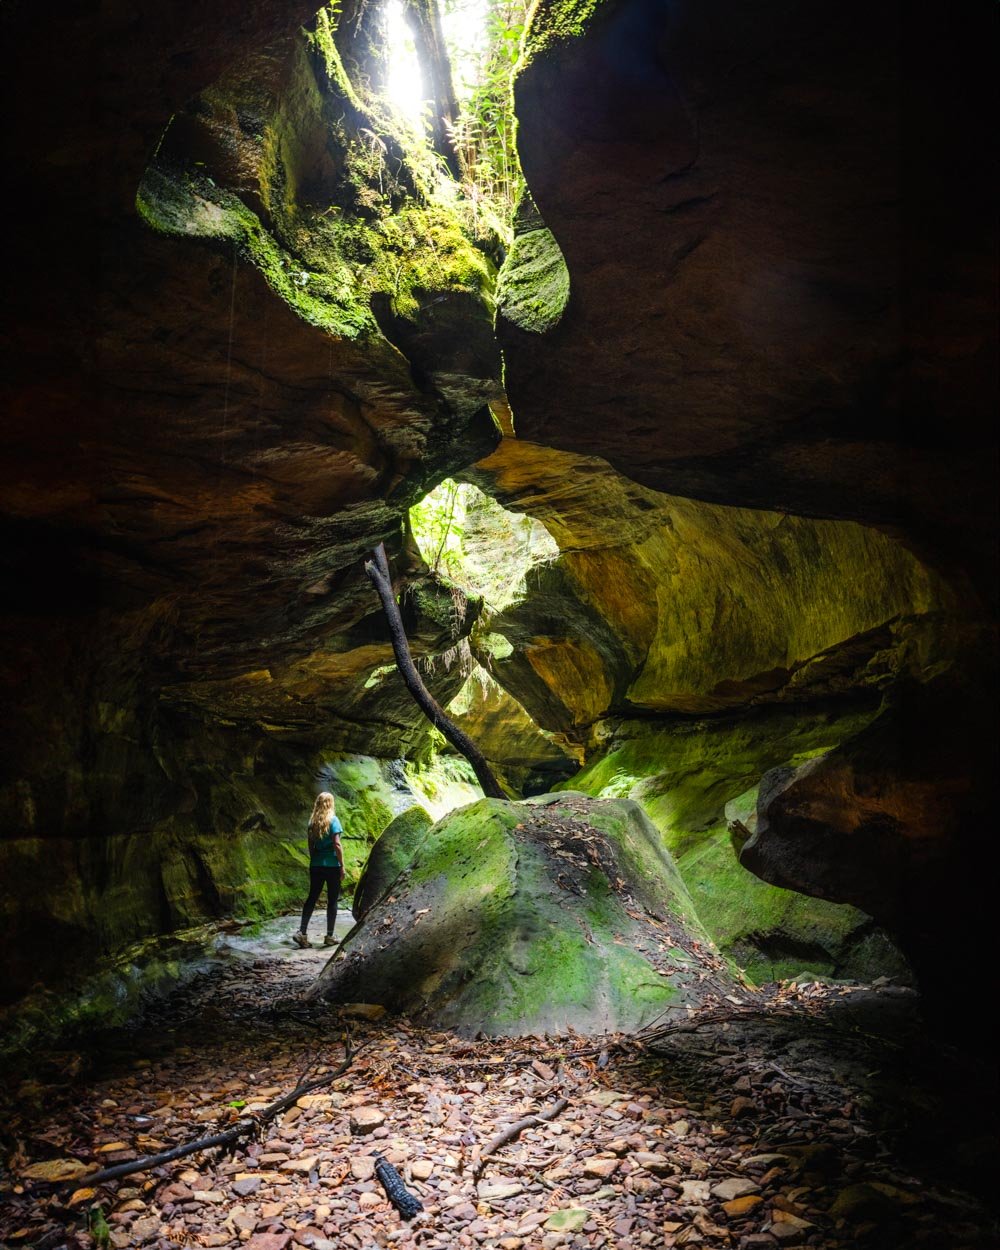
The next few hundred metres through the overhangs and canyon is a delight, the route is easy and the scenery is fantastic. You’ll pass two huge overhangs, one of which had a small waterfall running over the top of it on our visit.

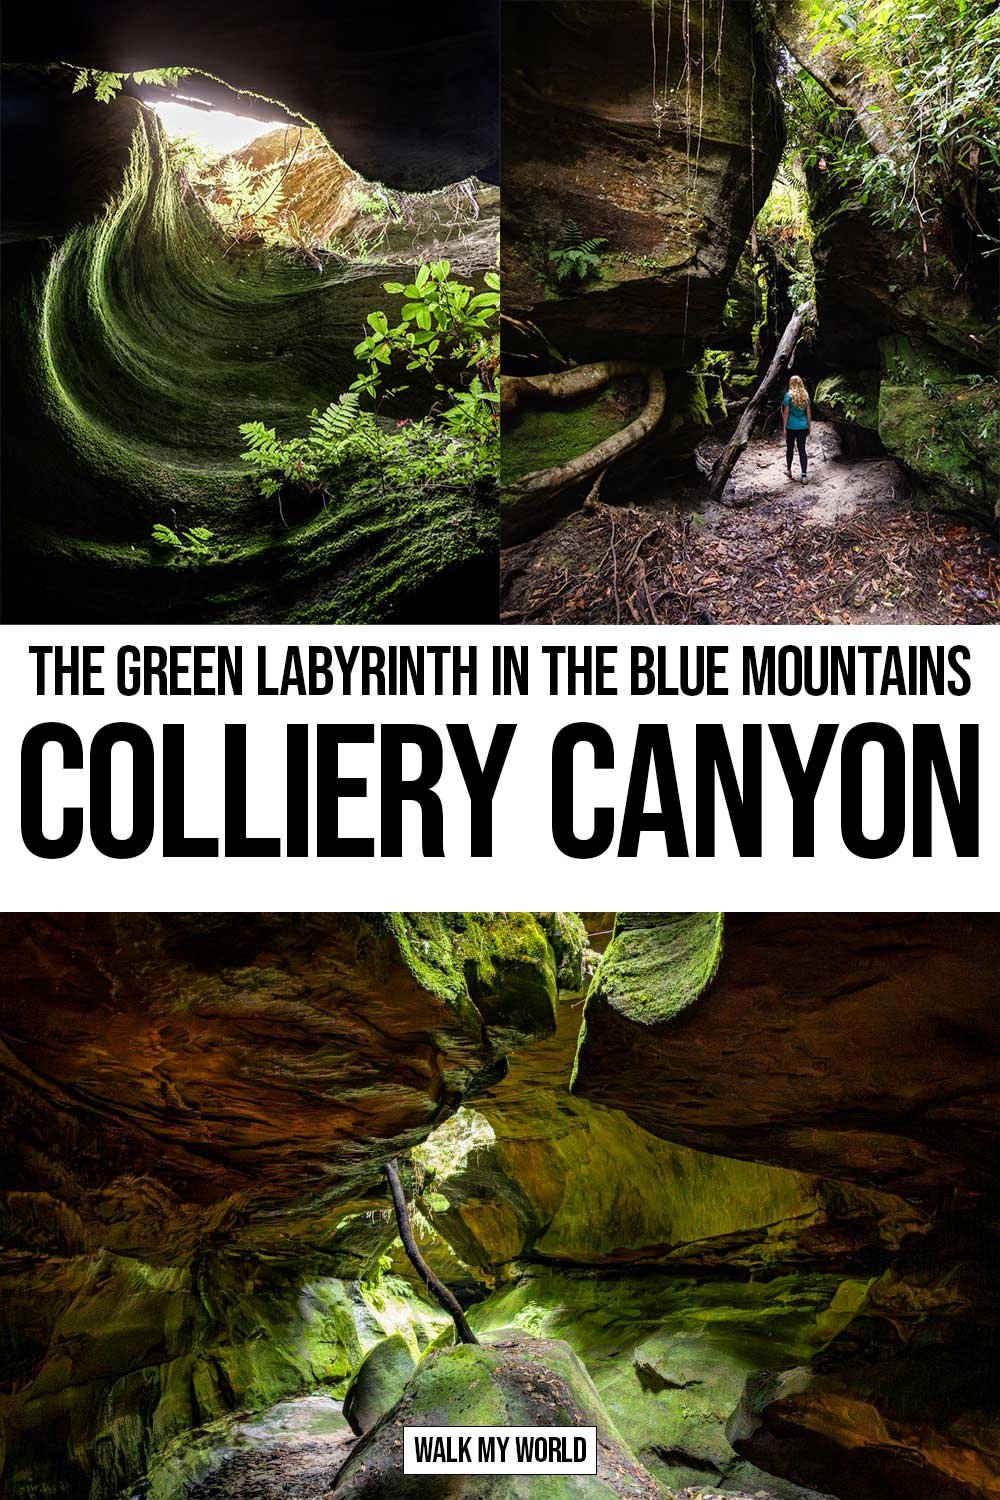
After around 100m you’ll enter the canyon which begins with some beautiful swirling cliff walls. There’s still a decent amount of light here and the walls are covered in ferns.


The canyon walls will then begin to narrow and you’ll enter some dark passages. Look out for the crazy octopus trees on either side of the walls which are pretty amazing. One looks like it’s trying to strangle the wall!

The darkness gives the canyon an air of mystery, which was heightened by the sound of water dripping from every crack and crevice. It could have felt eerie, but it was very atmospheric and I loved it.

That’s why I would recommend an overcast day because I think dappled sunlight in the canyon would have a totally different vibe. Darkness seemed to suit this canyon and really enhanced the experience for me.


Continuing through the narrow passage will bring you to a small pool, at which point you can go no further.

If you climb down into the pool area you can see what I think is the most amazing view of the whole walk!


From here you’ll be looking up at the incredible deep green curved walls, with a small window at the top that reminded me of places like Antelope Canyon in Arizona.

Canyon safety
Though Colliery Canyon is a dry canyon, all canyons have a risk of flash flooding during heavy rain. Never enter a canyon if it’s raining or if rain is predicted. Floods can occur at alarming speed. We wouldn’t recommend visiting directly after heavy rain either incase there is residual water still in the creek.
We visited a couple of days after quite a wet period and this worked well, there was no water in the canyon, but everything was green and dripping, which made it extra special.
Getting to Colliery Canyon
If you follow our route you’ll park off the Bells Line of Road (fully sealed) just outside Bell at these coordinates: -33.514591, 150.290611. There is plenty of room for a number of cars to pull fully off the road.
This is roughly a 28km and 30 minute drive from Katoomba and 120 km and 2 hours from Sydney.