

Mount Rainer National Park is the jewel in the crown of Washington hiking. The namesake mountain is magnificent but even on the days when it was hidden behind cloud we remained captivated by the park and Mt Rainier’s Hikes. It reminded us a little of the Alps.
Mount Rainier has a really short hiking season with snow lingering long into the summer and often back again by September. Expect to be snowed on at any time of year. We were snowed on in mid-July, but that kind of added to the charm!
It’s also hugely spread out so driving distances may mean you have less time to hike than you think so it requires some careful planning which we go through in detail.
Here’s our take on the best Mount Rainier hikes and what to expect from the trails.
The best Mt Rainier hikes for stunning views
Organising your trip to Mount Rainier
Mount Rainier looks fairly close to Seattle on the map, but the nearest entrance (Nisqually) is a surprising 2 hour drive! This entrance is famous for long tailbacks in peak season, so try to leave really early or book a hotel nearby.
Mount Rainier is a deceptively large national park and getting between areas can take a very long time. For instance, Mowich Lake (for Tolmie Peak) looks pretty close to Sunrise, but is actually a 2.5 hour drive away! The huge volcano and few roads make getting between areas slow going, especially when you add in the inclines and traffic on the single lane roads.
We recommend sticking to one area if you only have a day. Mowich Lake is the section that is out on a limb as you will have to drive out of the park and round to get there. You could combine Paradise, Sunrise and Tipsoo Lake, but it would make for quite a rushed day.
Knowing this, here’s the best hikes by area in Mount Rainier.
A note on Washington Hikes
Hikes in Washington are a lot steeper than anywhere else we’ve been in America, so classifying the difficulty can be tricky. In general, we’ve tried to classify the difficulty in relation to other hikes in Washington. This doesn’t mean “easy” is flat (there are very few hikes that are flat in the Pacific Northwest) it simply means it is the easiest hike in the area!
Best hikes in Paradise, Mount Rainier
About Paradise
Paradise is one of those quintessential alpine spots and worthy of the name. This place is characterised by beautiful wildflower meadows and just how close you feel to Mount Rainier which looms over this area. Paradise is a great spot for stunning views of glaciers, waterfalls and the mountain ranges and valleys in the southern part of the park.
This is also a great place for wildlife as we saw so many marmots close to the path (some were fighting!), mountain goats, grouse, deer and chipmunks by the million.
Paradise also has the Paradise Inn which serves food, but does seem to be the victim of powercuts which can dramatically shorten the menu! If you’re lucky, you can book a room here and have the pleasure of being up close to this incredible place once the crowds have left for the day.
Getting to Paradise
Paradise is one of the first stops in the park from the Nisqually entrance and only takes 30 minutes to get to. It can become incredibly busy during peak season, so we recommend avoiding the middle of the day or weekends if you can.
Read next: The top North Cascades hikes you can do in 24 hours
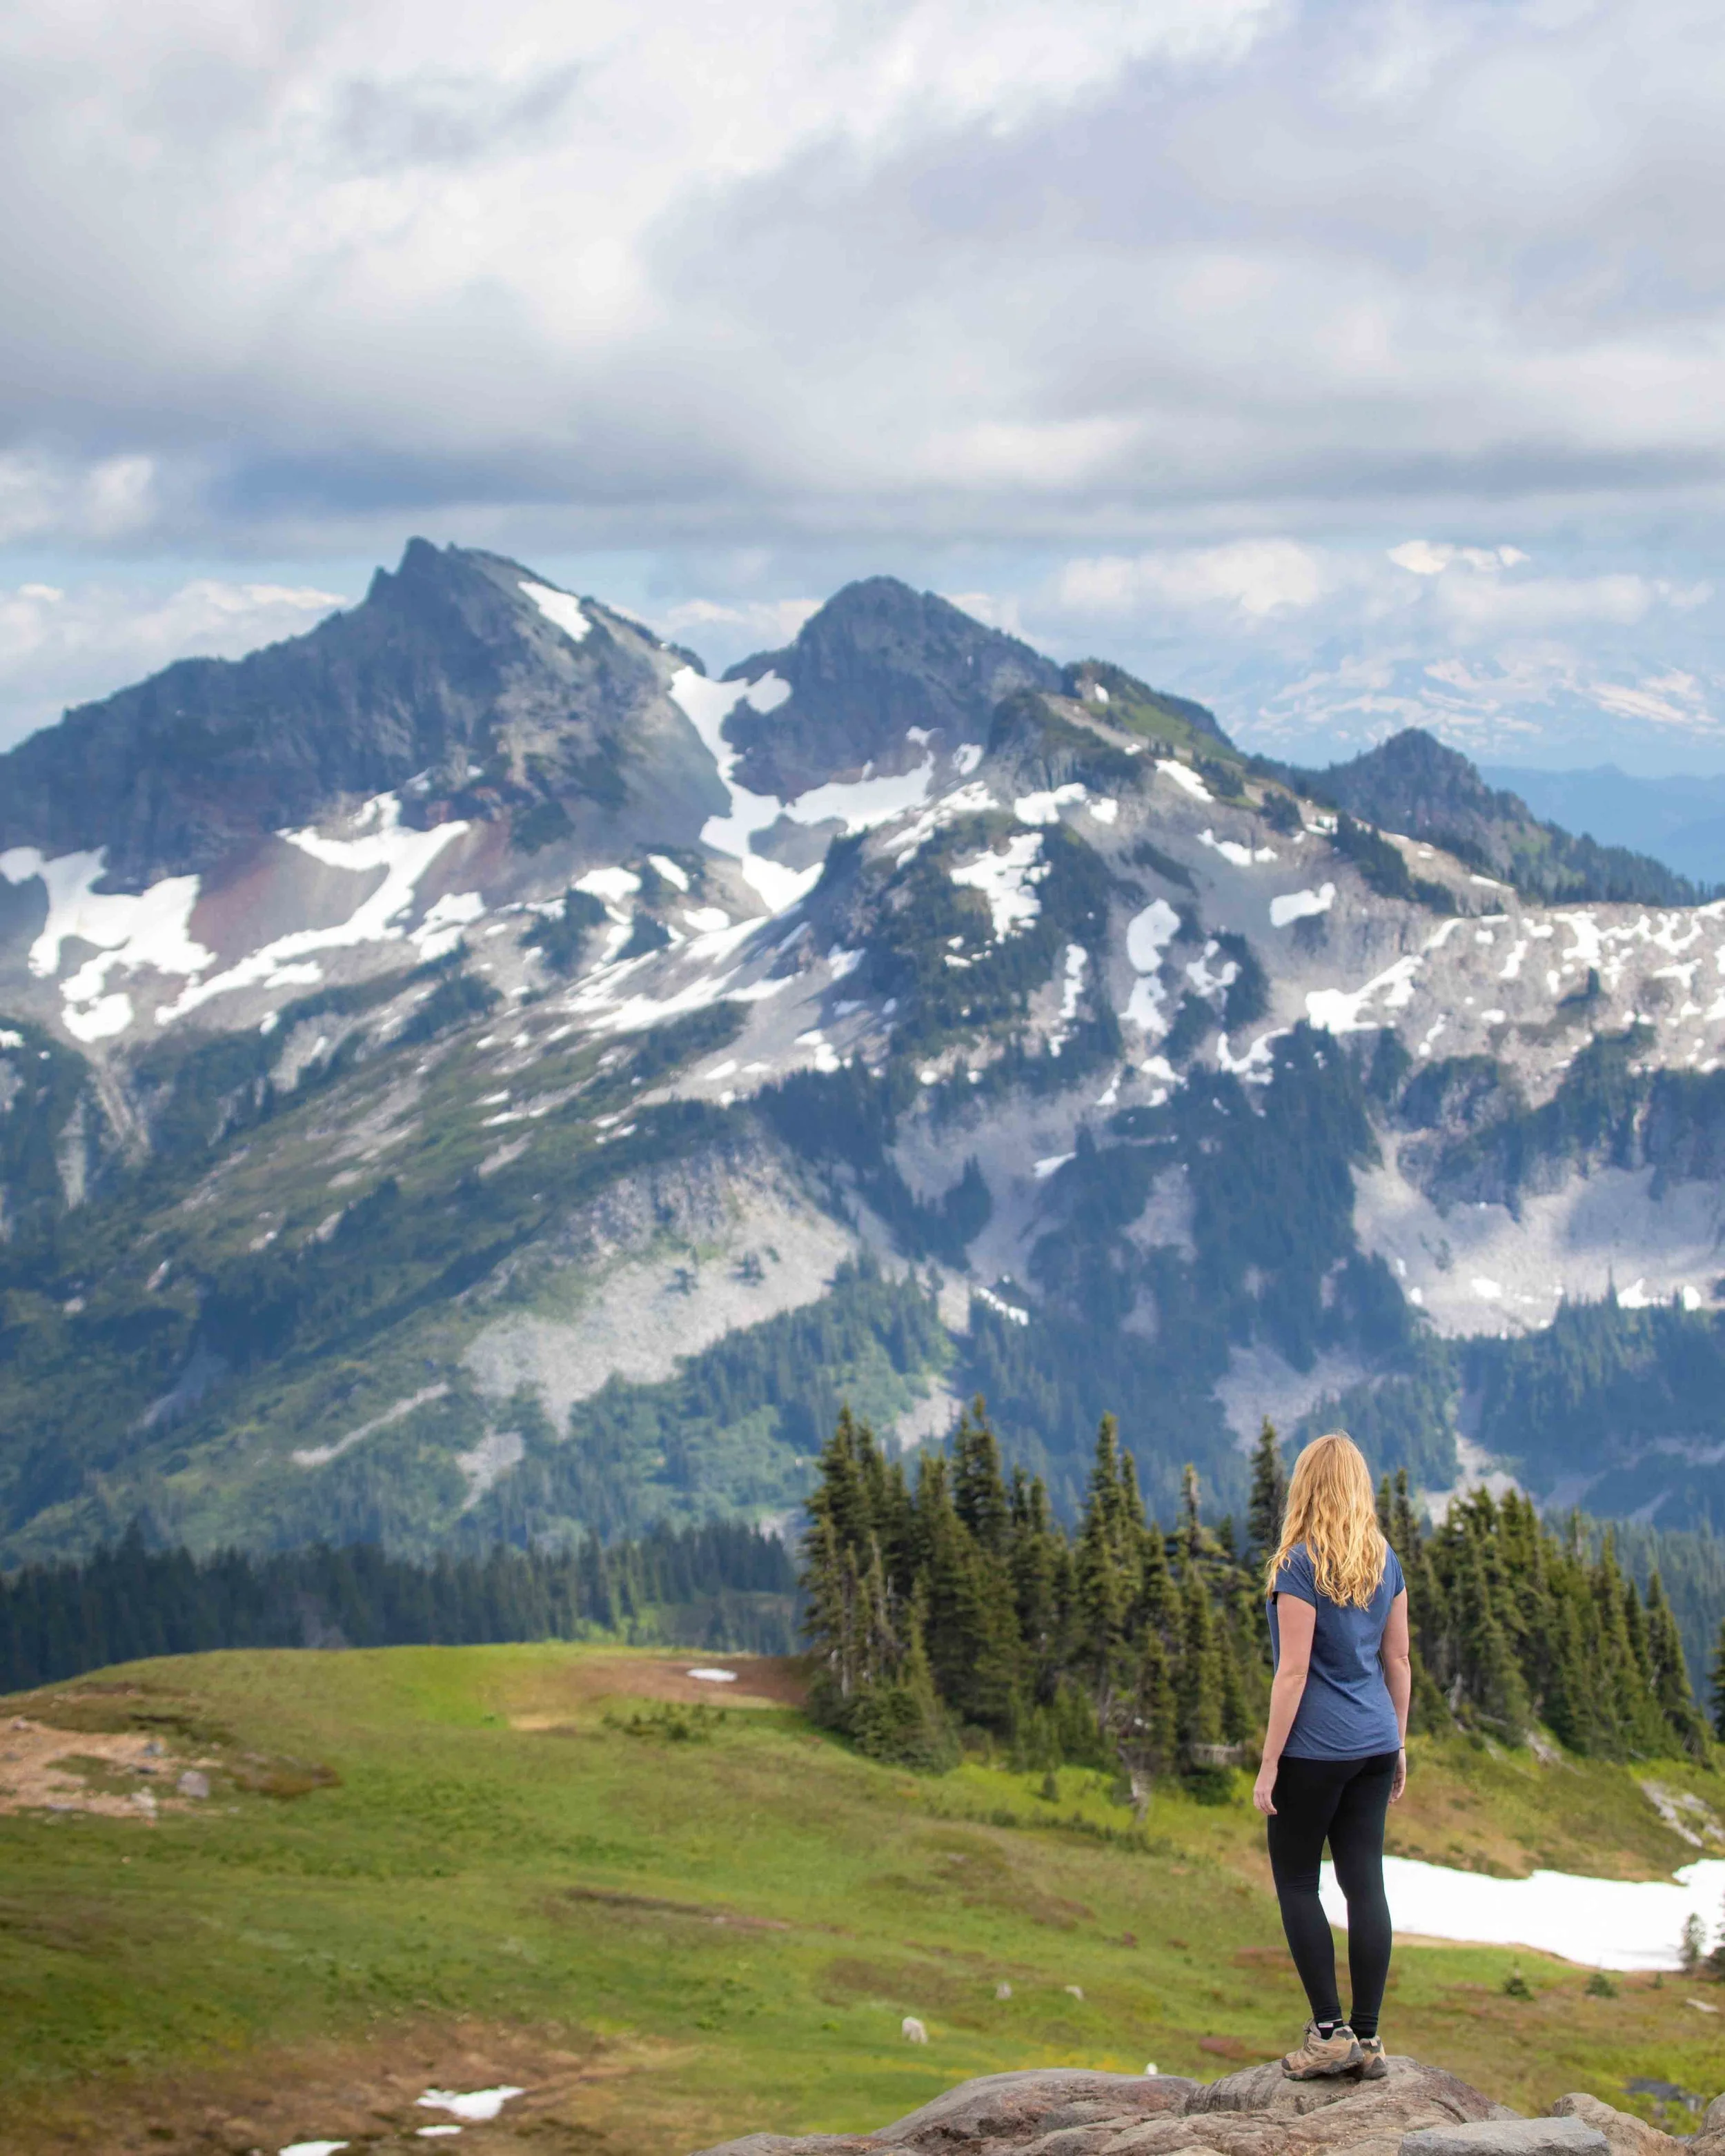
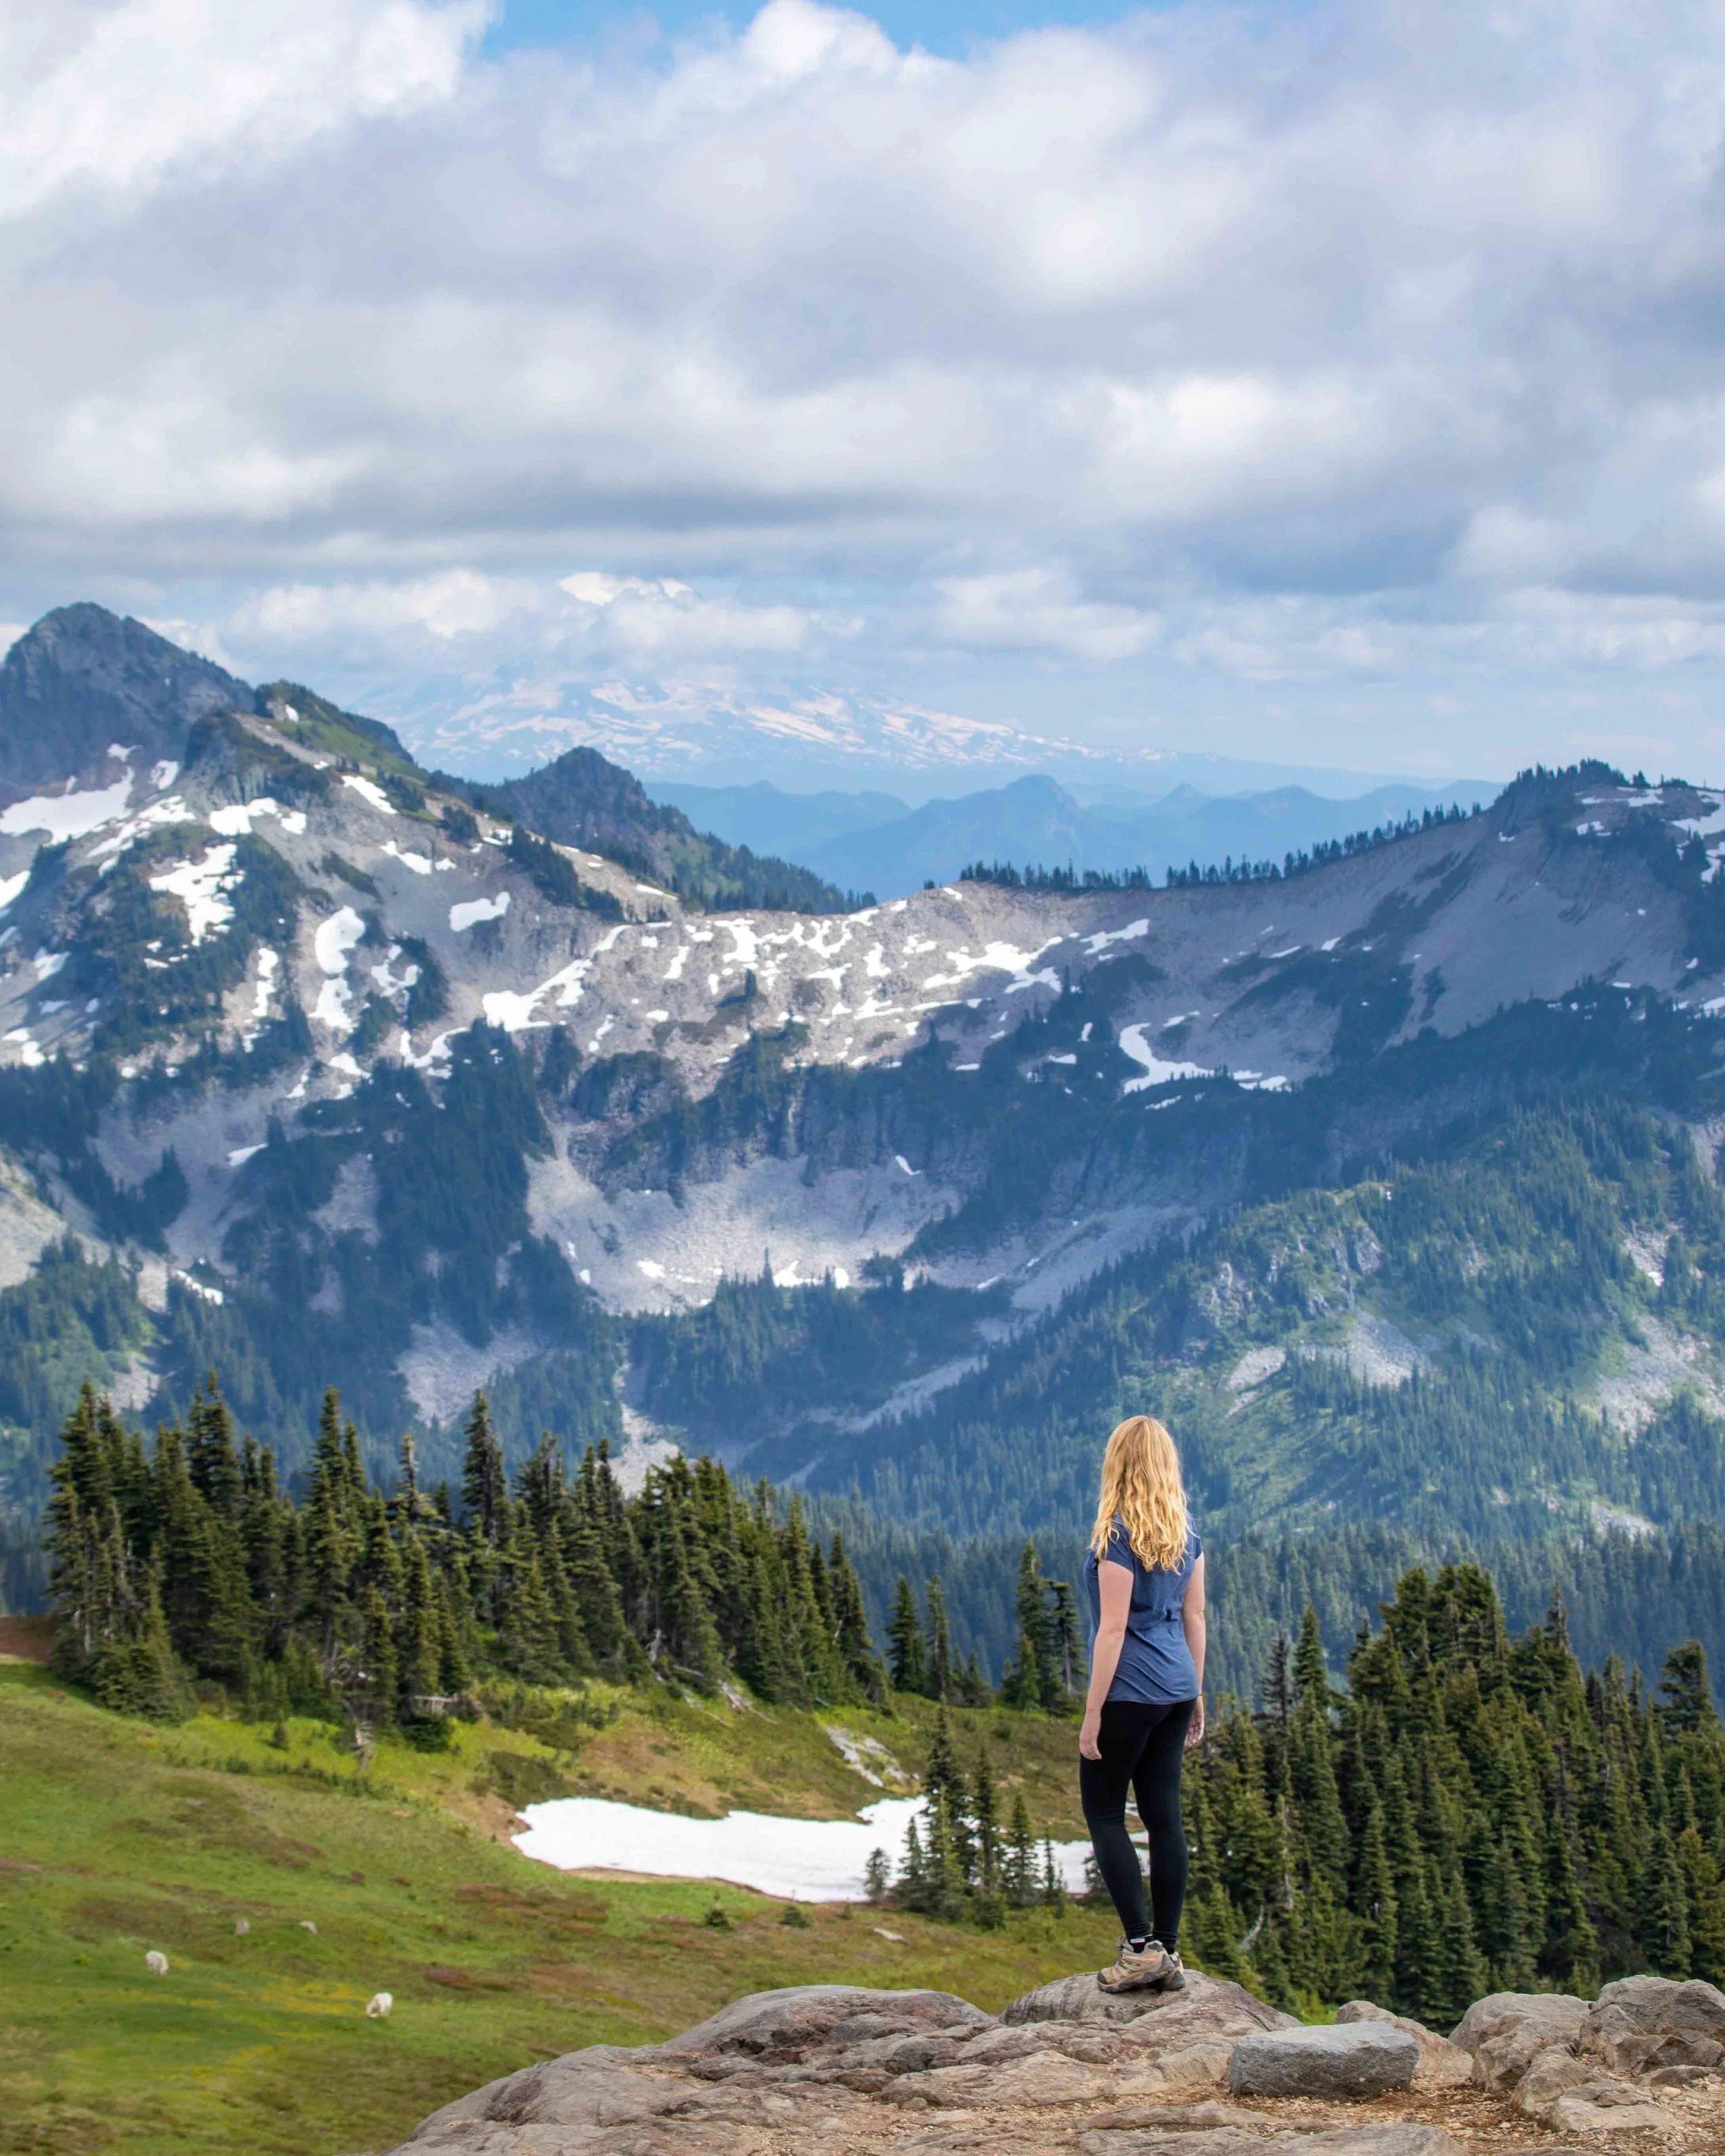
1. Skyline - for the wow factor
Distance: 5 miles (8km) return
Difficulty: Moderate
Elevation: 1300 ft (394m)
Time taken: 3 hours
The most famous of all the hikes at Mount Rainier and despite the crowds one that shouldn’t be missed. This track is all about the views and they are with you for almost the entire trail.
You’ll start on a wide paved path which begins ascending towards the mountain almost immediately. We were surprised at just how steep it was given its popularity.
This is no walk in the park, although you can turn around at any point having still got a good view of the mountain. Even if Mount Rainier is under cloud it won’t matter because the entire mountain range is spectacular.
We were recommended by a ranger to take the Dead Creek Trail as it was quieter than the Alta Vista Trail and also a shallower gradient. We’re not sure it felt that quiet but it had spectacular views so we weren’t complaning.

After you’ve hiked for a couple of miles you’ll come to a section of track heading towards Panorama Peak which was snowy even in mid July! We’d recommend bringing traction devices for probably all months but August.

At this point you feel so close to the glacier and if you’re lucky Mount Rainier too, although often, as it was for us, she is hiding! Look out for marmots along the slopes just before Panorama Peak, we lost count after we got to 30! Mountain goats are also in this area and we were lucky enough to see two.

The track before the lookout completely flattens out and it’s a nice break from the climbing. The view from the peak lookout is incredible with mountains in every direction and it’s a good spot for a lunch break.
From here you then have a little more climbing to do before the final half of the track which heads downhill and around the glacier towards the visitor centre. Unfortunately the snow was so heavy on this section of trail that we had to turn around and hike back on the Alta Vista Trail.
We had left our Yaktrax (traction devices) in the car and there was no way we could make it. Definitely make sure you have some with you as we were so disappointed to miss this section of track which looked amazing!
If you want peace and solitude on this track you will need to come early. It was busy even towards sunset on our visit.
Read next: A detailed guide to the brutal Mount Storm King trail
2. Nisqually Vista - for epic views without the mountain climbs
Distance: 2 miles (3.2 km)
Difficulty: Easy
Elevation: 377 ft (115m)
Time taken: 1 hour
This trail is easy and despite having great views was really quiet when we hiked on a busy Saturday afternoon. It’s a wide paved path the whole way and whilst it does have some ups and downs is one of the easier walks in the park.

We actually think the view of Mount Rainier from the section of track between the visitor centre and the trailhead were the best of all so we’d recommend starting from there and not from the official trail head car park.

Once you’re on the loop proper you’ll be walking in forest and out to three main lookouts. All offer fantastic mountain and glacier views. This is a great short walk for families who want to see some beautiful views but not embark on one of the more taxing hikes.
It’s also pretty good for wildlife spotting with both deer and grouse spotted on the track. We had a great performance from the male grouse trying to attract the female who wasn’t in the least bit interested!

A male grouse putting on a display, Mount Rainier
Best hikes at Sunrise, Mount Rainier
About Sunrise
The drive into Sunrise is simply spectacular. Once you leave the forest, you’ll see the mountain range and Mount Rainier appear for an incredible view which had us pulling over for photos. Sunrise is another one of the most popular places in the park, especially as it is closed during the winter.
The main area is another beautiful alpine setting with the addition of having hundreds of chipmunks that scurry through the car park and sometimes even a black bear or two. It may not have the meadows of Paradise, but the views more than make up for it.

There is a small restaurant here that serves food, as well as a gift shop. Be aware that Sunrise does have bear activity, so be mindful with your food and follow the advice that is posted.

The picnic area at Sunrise, Mount Rainier
Getting to Sunrise
We’ve heard that Sunrise can become incredibly busy - even with the huge car park. We recommend avoiding the middle of the day if you can. We arrived at 5pm and it was virtually empty!
Sunrise is a long way from the Nisqually entrance to the park (2 hours) and still 1.5 hours from Paradise. It isn’t too far from the Naches Peak/Tipsoo Lake hike (45 mins) if you want to combine the two areas.
Read next: The best Olympic National Park hikes you must do!
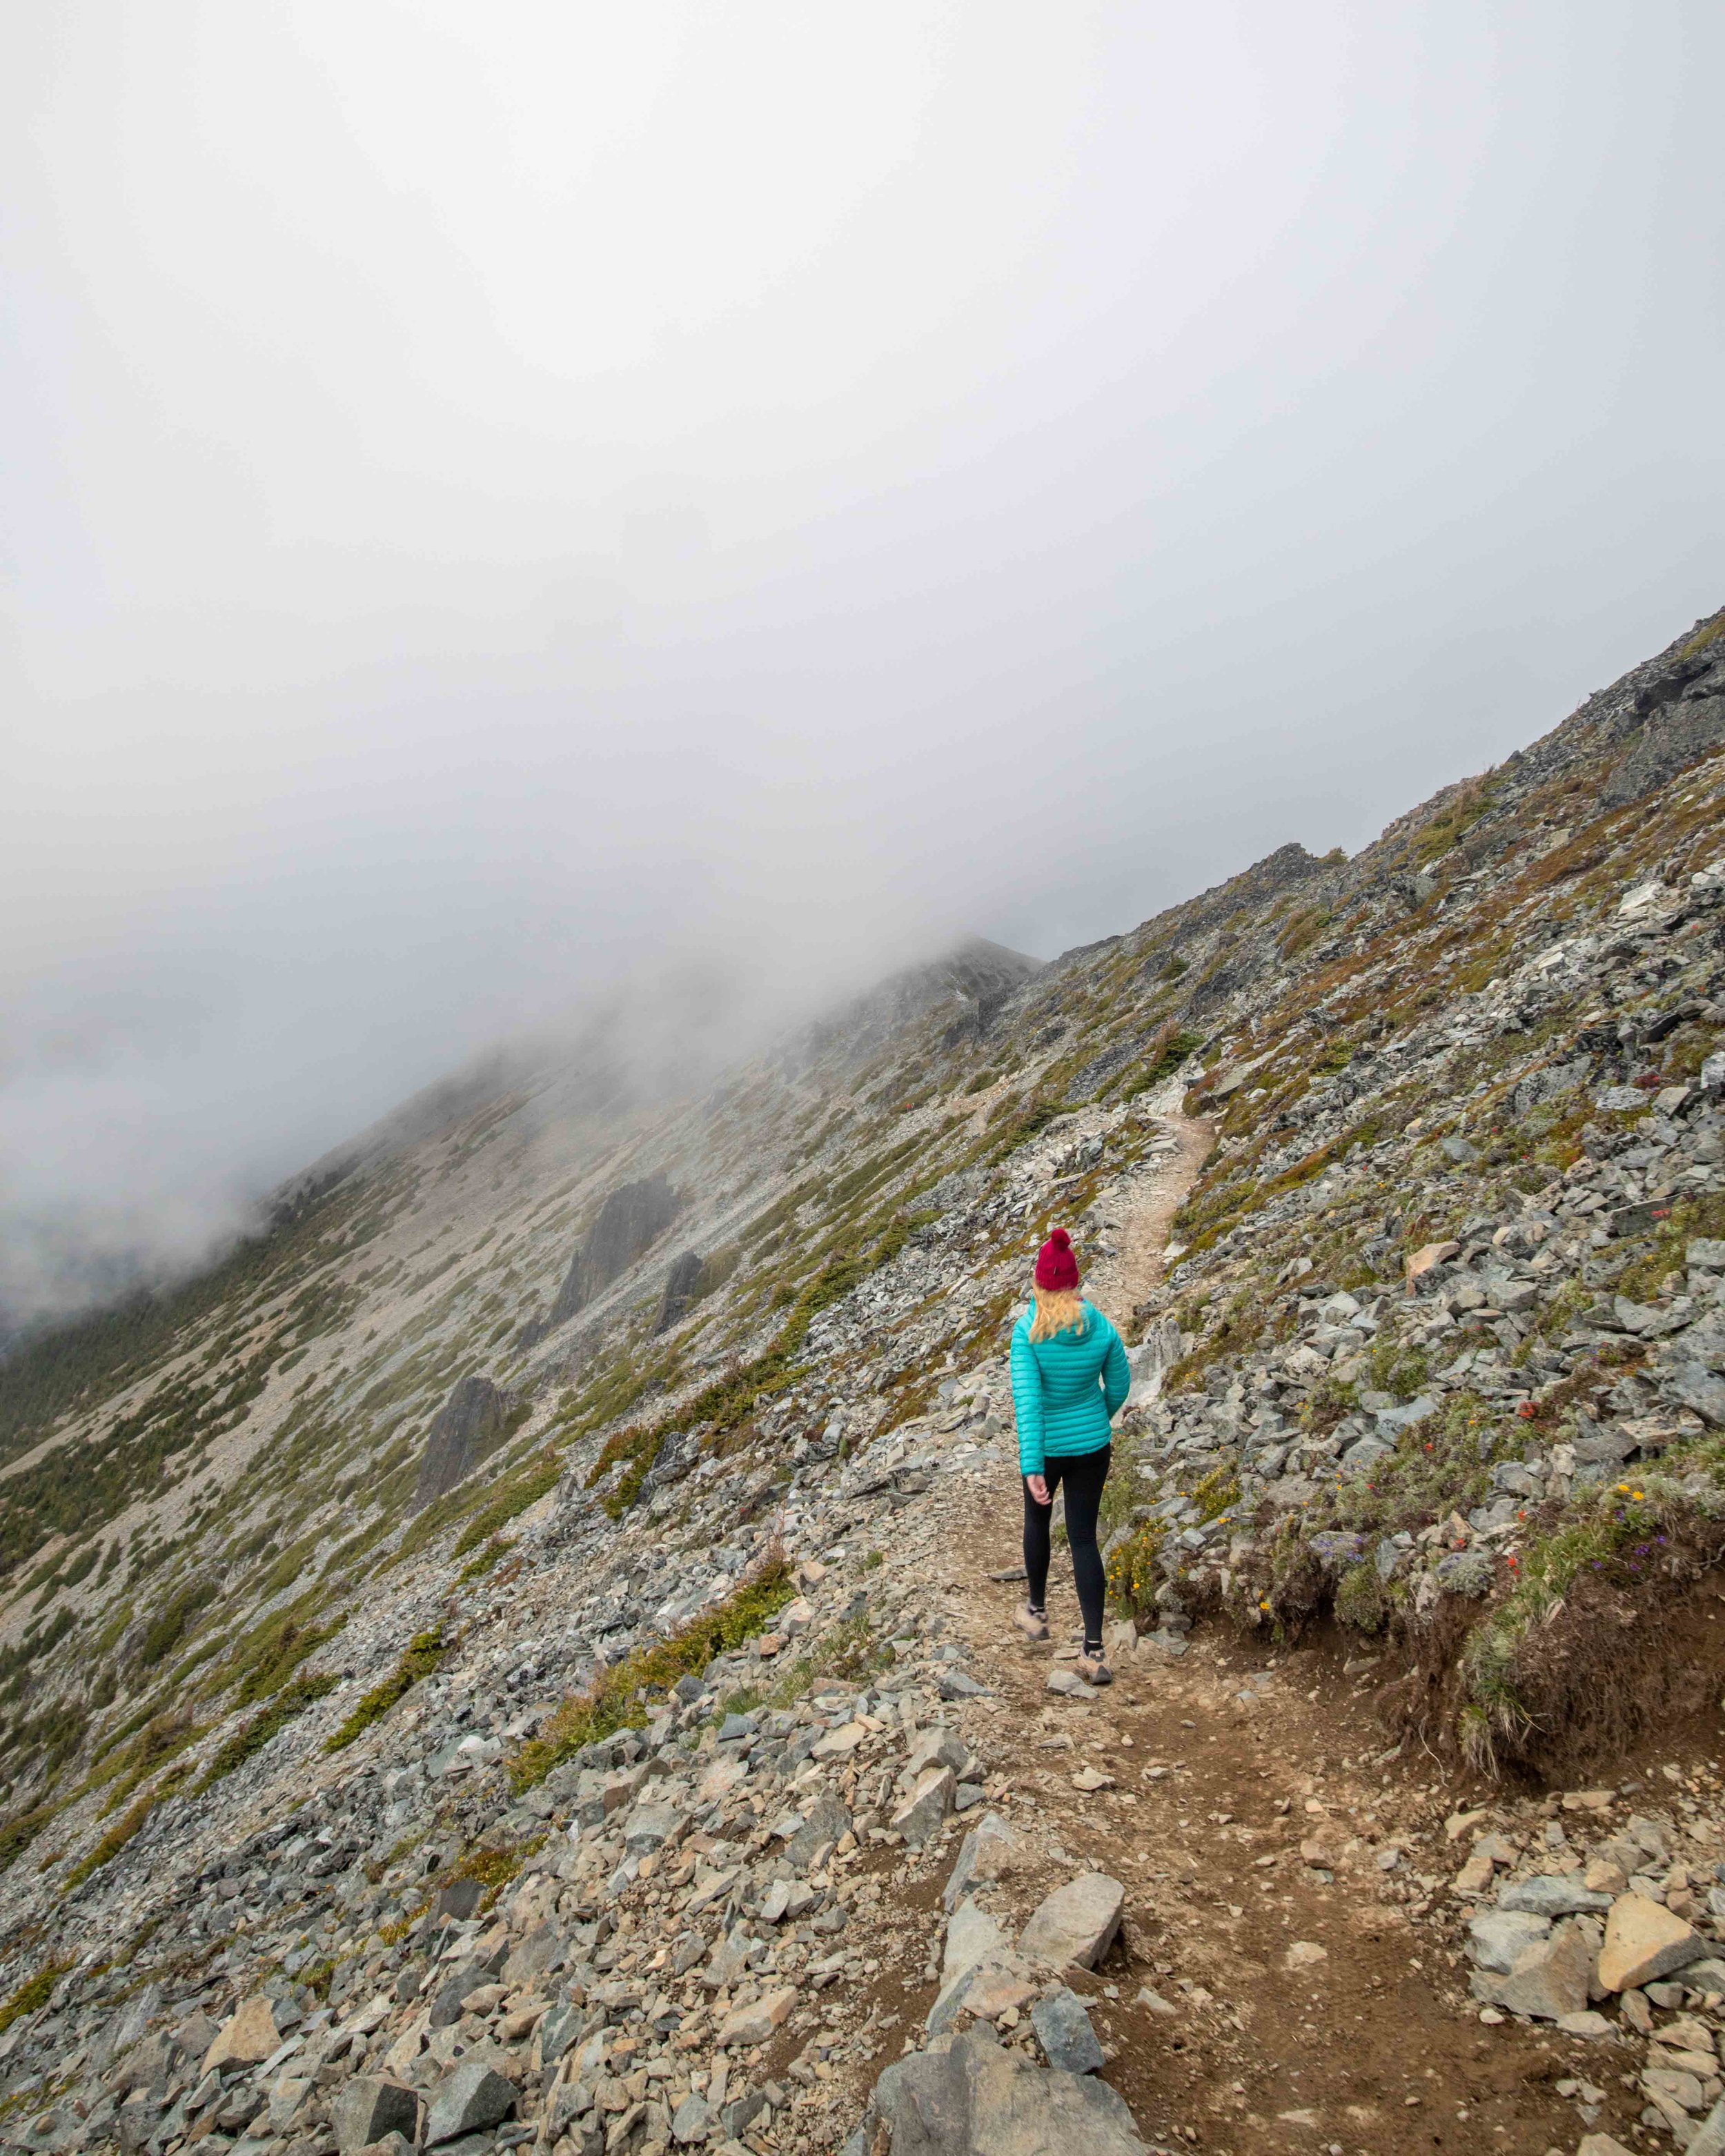
3. Fremount Lookout - for the wilder side
Distance: 6 miles (9.5 km) return
Difficulty: Moderate
Elevation: 850 ft (260m)
Time taken: 2 hours 40
Despite the fact we only briefly saw Mount Rainier on this hike and had a full white out at the top we loved it! The effort versus reward ratio even in our dire weather conditions was outstanding.

You’ll start on a wide paved path which heads immediately and steeply uphill before you reach a narrow gravel path running along the hillside. This is where the trail starts to get atmospheric and remains so until the very end.
The mountain views are breathtaking. Some of the best in the park. You have quite a long flat section before you begin climbing all the way to the lookout.
Along the way you’ll get an epic look at Mount Rainier as you traverse a ridgeline with panoramic views. The clouds came down so low along this section that we could only see glimpses of the mountains, much like our experience on the Routeburn Track in New Zealand, which only added to the atmosphere.

You don’t even notice the climb as you are so captivated by the setting. The trail is quite rocky along the ridge and gets more so as you make the final ascent to the lookout.
It’s as captivating a spot as you could ever hope to find, we just hope you get luckier than us with the views.

We hiked up for sunset and would recommend it if you have a clear forecast.
This trail was the quietest of all the tracks on this list and despite the conditions was one of our favourites. If we had the chance to do it again with a clear forecast we’d be there in a heartbeat.
4. The one that got away - Burrough Mountain
This was on our list to hike but we ran out of time as driving distances in the park are huge. To be honest had we have known how epic it looked we’d have hiked this one over some of the others. The beginning of the trail is shared with the Fremount Lookout track before you take a left along a ridge towards Mount Rainier.
The mountain looked so close you could almost touch it and we wavered on whether to head there instead but in the end stuck to our plan to reach the fire lookout. If you have time we would recommend to do this one because in terms of how close you get to the mountain we don’t think it can be beaten. Hopefully we’ll be back to do it ourselves one day!
Mowich Lake
About Mowich Lake
Mowich Lake can be popular for day trippers looking to swim and paddle board on the lake, so we recommend avoiding the middle of the day as parking is limited and overflows down a steep road! The road to Mowich Lake is a long way away from the rest of the park and 15 miles of it is dirt road. Whilst it is in very good condition, you will want to take it slowly if you have a rental car.
There are toilets and basic facilities for campers, but nothing like areas such as Paradise or Sunrise. Here you’ll want to bring your own food and supplies.
5. Tolmie Peak - stunning sunset views
Distance: 3 miles (approx 5km) each way
Difficulty: Moderate - steep but short
Elevation: 1260 ft (384 metres)
Time taken: 1 hour 40 up, 1 hour down
Tolmie Peak requires a little more effort than the rest of the hikes on this list but it will definitely be worth it. Although it’s a pretty steep climb much of the way the trail is excellent condition and lots of switchbacks make the gradient a lot more gentle than the Skyline Trail.

You’ll start at Mowich Lake which if you have time looks like a beautiful swimming or paddle boarding spot. You head straight into the forest and have a nice flat section of track to warm up on.
You’ll then have some gentle uphill, followed by a slightly soul destroying downhill before the real climb begins. You head up on a series of switchbacks before you reach the drop dead gorgeous Eunice Lake.
This spot is pretty much paradise but for the horrendous mosquitos! Seriously, bring strong bug spray.
After the lake you continue briefly in the forest before climbing another set of switchbacks where you’ll get your first clear views of Mount Rainier. It’s one of the most incredible views in the park in our opinion.
From here it’s uphill all the way but you don’t have far to go before you reach the ridge and then the picturesque fire lookout. It’s particularly photogenic at sunset.
Here’s the full low down on the Tolmie Peak Lookout hike.
Other hikes at Mount Rainier
6. Naches Peak - for a taste of the alps
Distance: 3.6 miles (5.85 km) loop
Difficulty: Easy to moderate
Elevation: 738 ft (225m)
Time taken: 1 hour 40
Naches Peak was the first walk we did in the park and really set the tone for the amazing hikes to come. This walk gives you plenty of spectacular mountain views as well as the chance to see deep blue lakes and lots of wild flowers.
It reminded us of walking in the Alps!

Whilst there are quite a few uphill sections on this track it’s not too difficult with plenty of flat sections to catch your breath.
A local recommended us to hike clockwise for better views of Mount Rainier, whilst we didn’t get to see the mountain due to cloud we can see how good the views could have been for much of the walk in this direction!

You’ll start at the pretty Tipsoo Lake which is a great picnic spot and on a clear day has a reflection of Mount Rainier (best in the early morning). The hike begins sloping gently uphill and then follows a wildflower lined ridgeline for most of the way.
The forest is beautiful but it’s the amazing views down to the lakes and out to the mountain range which really make this hike special.
The trail is in excellent condition which makes for easy walking, especially considering how incredible those views are.

We were surprised at just how quiet this trail was so it’s good for anytime of day. If you’re a photography lover the lake is said to be most still for the best reflection at sunrise.
Getting to Naches Peak
The Naches Peak Trail starts at the car park by Tipsoo Lake which is 1 hour from Paradise and 1.5 hours from the Nisqually entrance to the park.
This is a good trail to do at any time of day as there is plenty of parking and not too many people seemed to go here.
7. Grove of the Patriarchs - for all the family
Distance: 1.1 miles (1.8km) return
Difficulty: Easy
Elevation: 88 ft (27m)
Time taken: 45 minutes (mainly appreciating scenery)
This is the easiest walk on our list and the only one that doesn’t have mountain views. What it does have are loads of incredible ancient trees which give you the feeling of wandering amongst giants.
The path is well maintained and whilst not entirely flat it’s overall a very easy walk. The forest is incredibly peaceful and you can take a break on the pebbly beach beside the river.
There are a couple of fallen trees along the track which make for some great photo ops as well as a swing bridge just before the oldest patch of Douglas Fir trees. Stand alongside one and look up to truly feel their grandeur.
This track is extremely popular with families and the car park is tiny. You’ll want to come early or late if visiting on a weekend in summer.
You can park alongside the road too which is what most people end up having to do a lot of the time.
Getting to Grove of the Patriarchs
The Grove of the Patriarchs is an hour from the Nisqually Entrance to the park and 30 minutes from Paradise. There is a small car park and quite a few people park on the side of the road.
This is a very popular trail, so we recommend avoiding the middle of the day.
Be bear aware at Mount Rainier
Another of the joys of visiting Mount Rainier is the amount of wildlife in the park. Black bears do frequent the area, particularly around Sunrise and Mowich Lake.
Generally black bears will avoid you if you make a lot of noise but you may want to carry bear spray in the rare case one goes rogue. There are also mountain lions in the Sunrise area but they are rarely seen. You can read the parks advice on encountering both animals at the trailhead.
Packing suggestions for Mount Rainier
Having the right gear can make a huge difference, whether it’s hiking during the hot summers, or the potential snow in the winter. Here’s what we pack and have relied upon for years:
Day Pack: Osprey Talon 22 (we’ve owned this for years). Check on Amazon, REI or direct with Osprey
Hiking Boots: Merrell Moab (for men and women). We’ve both used these for over three years and they just keep going. Check them out on REI or Amazon
Reusable water bottle: To avoid single-use plastic. Check then out on REI or Amazon
For winter
This post may contain affiliate links, meaning at no additional cost to you, that we will earn a small commission if you click through and decide to make a purchase.
This helps towards the costs of running our website. :-)
Like it? Pin It!


Follow us on social media
Are you planning a trip to Washington? Which Mount Rainier hikes are on your list? Let us know in the comments below!


