Update for 2024: We’re sorry to say that the route to the bottom of the falls is now prohibited. We don’t know if this is a permanent closure or not.
Over the past six months or so, we’ve been asked how to get to the bottom of Gerringong Falls on an almost daily basis. It’s one of those places that seems to be top of everyone’s list and yet the exact route down has remained something of a secret.
With pictures on social media of a gorgeous swimming hole beneath a huge waterfall and towering cliffs, it’s easy to see why it gets so much attention. And yes, it’s a fabulous spot but it requires some investment to get there.
In this post we’re going to share everything you need to know about whether going down to the bottom of the falls is right for you, because it definitely isn’t for everyone and there have sadly been some tragic accidents. We’ll also share what it’s like from the top - which is suitable for anyone who can manage a long walk or cycle.
If after reading this post you still have questions, please feel free to leave them in the comments and we’ll do our best to help.
It’s worth noting that there is no ‘right’ way of doing this track. We are sharing our way, we’re not saying it’s necessarily the best way, but it got us there!
Here’s how to reach the top and bottom of Gerringong Falls, one of the most beautiful in NSW.

The reality of reaching the bottom of the falls
Before we get into the nitty gritty details we wanted to share a general overview of the trail. Everyone will have different opinions on how easy or difficult this track really is, all we can do is give you ours - as well as take into account how we think other people might view it.
Difficulty and the trail
The majority of people will find this trail challenging. The 8.5km fire trail to reach the start of the track is easy, but the path down to the bottom is not.
There are no official signposts and people have left many arrows and tags which are often pointing in different directions and can actually be more of a hinderance than a help (although we have no doubt they were left with good intentions). Taking a wrong turn could be potentially dangerous if you stray too close to one of the cliff edges.

Steep and rough trail
You’ll need to be comfortable negotiating a rough track for approximately 1km. Whilst there are short patches of easy level track, the majority is rocky and there is plenty of loose leaf litter which can be slippery. Small parts of the track are exposed and would not be much fun for vertigo sufferers.
There is also one bit which I found quite hard and that’s ‘the chimney’. This is a rock chute with some natural footholds which brings you down a few metres of track that cannot be negotiated any other way. I’ll go into more detail at the relevant point in the track notes.

The rock chimney close up
Other than that it’s worth noting that if you don’t do long hikes regularly, the 17km walk or cycle plus the steep 1km track down and back up will be tiring, especially in the heat. You’ll want to allow plenty of time so you don’t feel rushed and can get back to the car park in the daylight.
If you haven’t done a track with any scrambling before we’d recommend doing some other rough trails before this one and working up to it. Again I don’t want to be patronising but I do want people to be prepared.

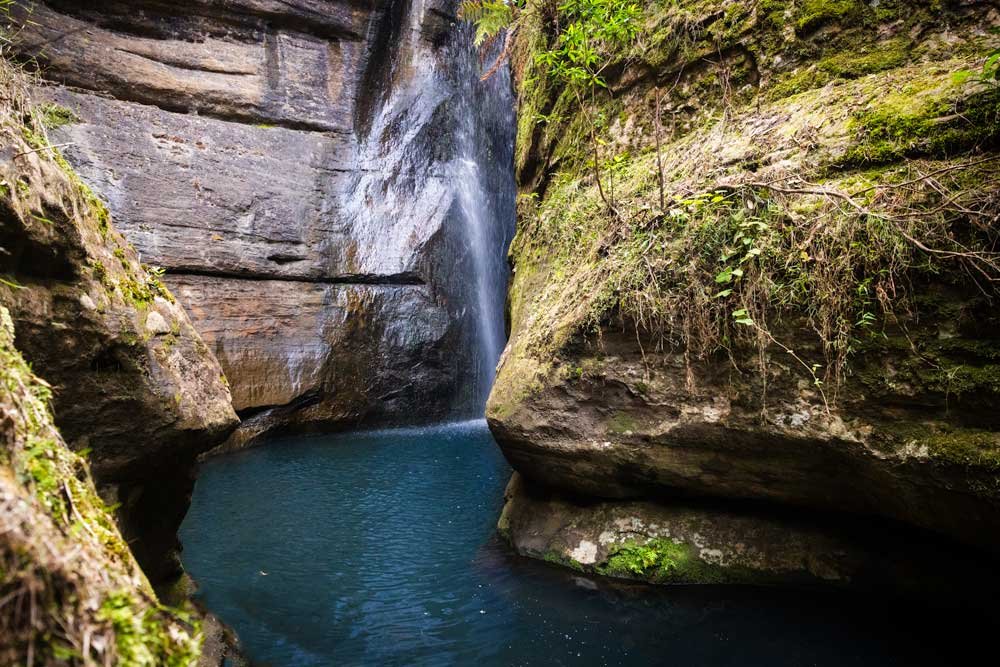
The bottom of Gerringong Falls
Leeches and snakes
Other things you might encounter on the trail at certain times of year and in certain conditions are leeches and snakes. Leeches whilst gross, are no big deal, spray them with a bit of OFF and they drop off, and snakes won’t tend to bother you if you don’t bother them - just give them a wide berth and don’t move any rocks around.
Preparation before you go
The instructions below are primarily for those who are hiking to the bottom, some may still be relevant for those just going to the top.
Allow at least 6 hours: Our whole trip took 6 hours, including cycling, hiking and enjoying the falls. Give yourself a lot of time and go early to allow yourself plenty of daylight.
Screenshot the instructions and images: There is some phone signal on the trail, but it’s best to have this all backed up on your phone before you go. It will make it a lot easier!
Download offline maps: This is probably the most important one to do, whether it’s Google Maps or any other form of GPS. Without this, your job will be a lot harder. Take note of the times we reference GPS co-ordinates as well to help you navigate. You can read how to download offline maps on Google Maps through this article.
Bring plenty of food and water: If you’re planning on going to the bottom, bring plenty of food and water just in case. If you get it right, it’s a 1.5 - 2 hour return walk, but if you get lost it could be several hours longer.
Wear good hiking shoes: preferably hiking boots, but any shoes with good grip will do.
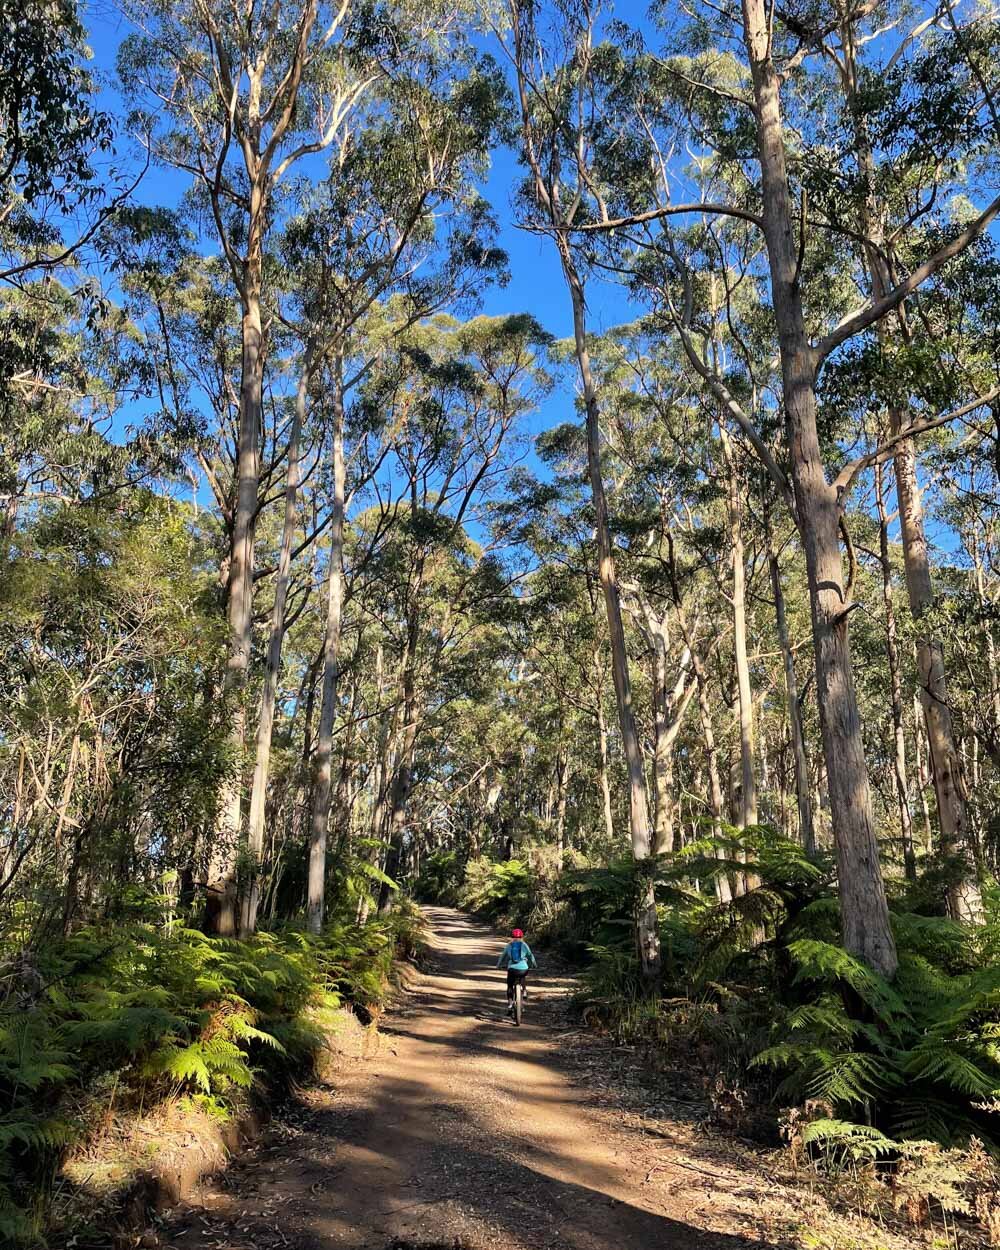
The cycle to Gerringong Falls
The stats
Distance: 8.5km each way
Elevation: 30m on the way there, 130m on the way back
Difficulty: Easy
As the first part of the adventure is easy firetrail you can cycle it! This speeds up the less interesting section.
The cycle to Gerringong Falls took us about 45 minutes on the way there and 50 minutes on the way back (mainly because it is a little hillier on the return). We aren’t fast cyclists, so you may be able to cover the distance quicker.
Click to enlarge
Hitting the fire trails
To reach the top of Gerringong Falls you need to either walk or cycle for just under 6km along the Budderoo Plateau Fire Trail. The track is wide and pretty well graded, there is the odd pothole but nothing to worry about. If you’re walking you’ll probably feel like it’s completely flat.

If you’re cycling (when you don’t normally) you’ll probably notice some gentle downhills and a couple of very short ‘hills’. On the way it all felt flat or downhill to me except for one very short slight incline.
It was more on the return that I felt a couple of little uphill sections and because I hadn’t ridden a bike in years and my bum was suffering!

On bikes, this section took us 30 minutes on the way there, with fresh legs!
After the Budderoo Plateau Fire Trail, you’ll then see another gated fire trail on the right, the Hersey Trail. You’ll cycle for roughly 2.5km along this fire trail, which is similar to the other one, both in terrain and gradient.

Neither fire trail is anything to write home about in terms of scenery but they are pleasant enough.
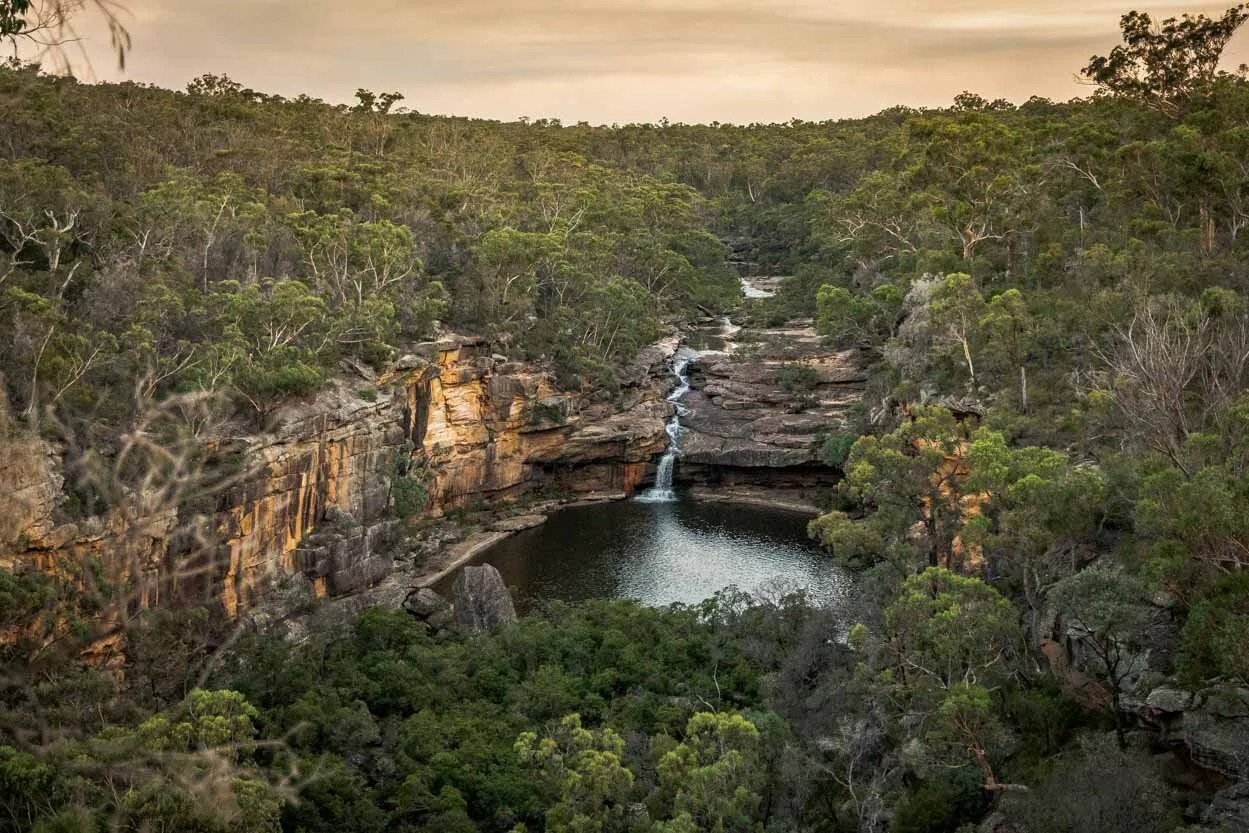
The top of Gerringong Falls
The stats
Distance: 620m each way
Elevation: 20m
Difficulty: Easy
The walk to the top of the falls is short, easy and doesn’t take long. It’s worthwhile adding on, even if your priority is getting to the bottom as the entire round trip only took 30 minutes.
The walk to the first lookout
The fire trail ends at the small yellow sign which says ‘no vehicles’ or something to that effect. It then narrows and the stones get bigger, so if you’re cycling it’s best to lock your bikes to the signpost and cover the last 620m (each way) on foot.

The path beyond the fire trail
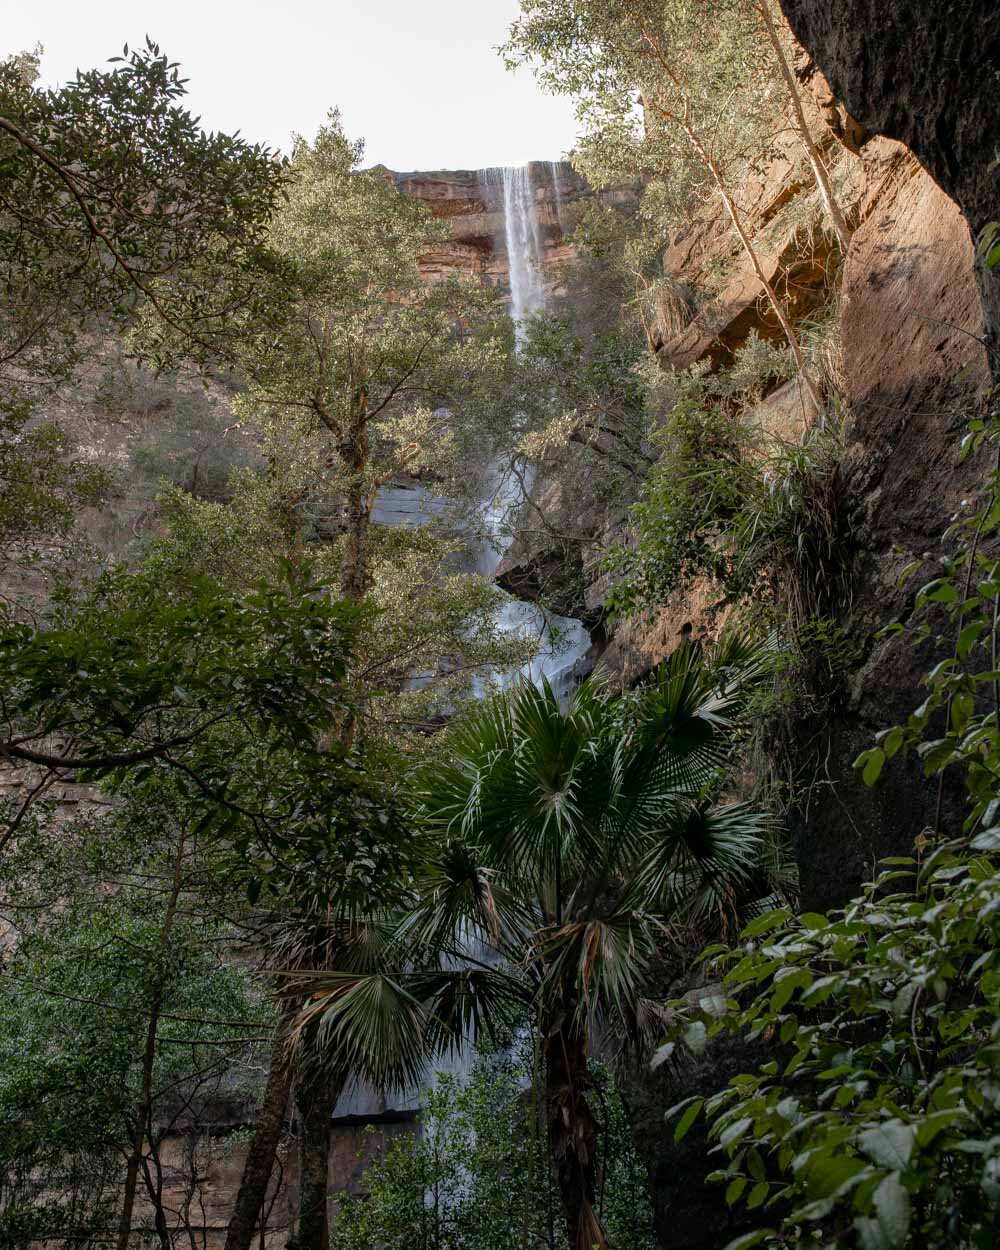
Just before you head for the creek, walk a couple of paces back down the fire trail and you’ll see an obvious path on your right. Walk down it for less than a minute and you’ll see a great view of the valley and an unnamed waterfall that we first thought to be Gerringong Falls, but later realised it couldn’t be!
The valley views
The other falls
It’s a great view and well worth briefly checking out before you head to the top of the falls.
The walk to the top of the falls
From the signpost where you lock your bike, you are 300m from the creek. You’ll see a narrow path to your left which heads into the bush and this is the route we took (although there are other routes too).

The creek at the top. Turn left and walk downstream
After 100m we popped back out the bush and then almost immediately headed back in again on the next path on the left. It’s a little overgrown but it’s not too bad and it’s easy enough to follow.
Just before the falls is a beautiful and calm part of the creek which would make for a great swimming spot if you don’t plan on heading to the bottom of Gerringong Falls. As we were, we continued on, but it would be a great place for a dip on a hot day.

After 120m you’ll reach the official top of the falls. It’s an incredible spot, you can feel the spray of the waterfall and you get an amazing valley view.

Just be careful though because it’s unfenced and wet from spray, so be really cautious with footing.


The walk to the best lookout of Gerringong Falls
It’s just a 100m walk from the top of the falls to a wonderful view of Gerringong Falls. Just walk a couple of steps back from the top of the falls and then continue following the trail. It’s similar to the other track, but a bit narrower in places and there are a couple of rocks and tree roots to climb over.
We noticed a couple of the trees had been marked with ribbon, you don’t need them but at least you know for sure you’re on the right track.
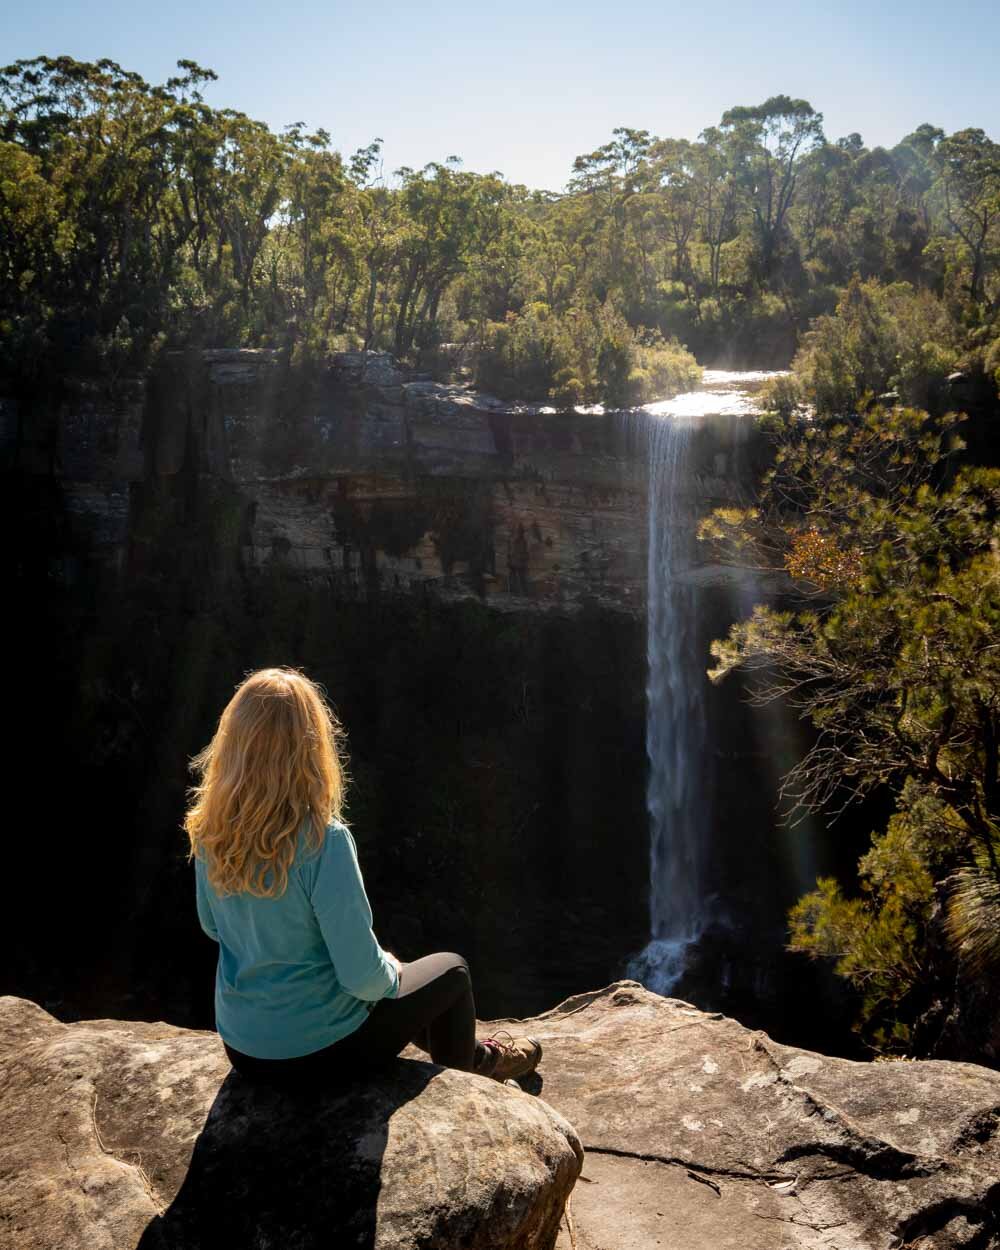
You’ll arrive a few minutes later at a really incredible view of almost the whole waterfall. There’s also a perfectly positioned rock to sit and relax on. This is a great place to take a break before embarking on the walk to the bottom of the falls (if that’s what you are planning to do).

The route to the bottom of Gerringong Falls
The stats
Distance: 1.1km each way
Elevation: 45m on the way down, 165m on the way back
Difficulty: Hard
The hike to the bottom of the falls is an adventure, but it isn’t easy. This is a trail for those who are used to scrambles and rough trails without any signage. However, if you go the right way it will take most people between 45 minutes and 1 hour each way.
How to find the trailhead
The trailhead for the bottom of Gerringong Falls is roughly 150m back from the signpost we mentioned where you can lock your bikes before heading to the top of the falls. There is quite a distinctive Y shaped dead tree on the western side of the fire trail (left side on the way in, right side if you’re walking back from the top of the falls).
I know it may not sound like a good marker, but trust us, it stands out! You can see what it looks like in the photo below.


In case it isn’t obvious, type the following co-ordinates into your GPS/Google maps: -34.6654412, 150.6521943 (you can click here to see it on Google Maps). At this point, look for a beaten path into the bush. You should see one that goes left, and another that goes right - take the left path (the right one dies after 200m).
We’d recommend moving your bikes from the signpost and locking them to a tree just inside the pathway to keep them out of the way.

You’ll head down the flat, easy path through the dense bush. Soon you’ll go past a large log and at this point you’d be forgiven for thinking that the difficulty of this trail is very hyped up!
Finding the chimney
After 150m the bush thins out, and the obvious and wonderfully easy path gives way, and you’re on your own! From here you’ll need to start looking for any clues to find your own way. We’re going to share as much as we can to help, but with a trail like this some of it is just trial and error. As mentioned there are ribbons and arrows periodically throughout the trail, but trust us, they aren’t always your friend. Often they contradict each other.
The next landmark to look for is the chimney, which is approximately 100m from the end of the obvious flat path. The co-ordinates for the rock chimney are -34.6653874, 150.6521363 (click here to see it on Google Maps), so this should help you know when you’re getting close! There are at least three ways of getting there that we saw!
Most people go down the rock chute - a narrow passage between two rocks you can see below. However, we took what we think is an easier path on your right.

The Rock Chute
Just before the rock chute, you’ll see a tree with faint arrows scratched into it (see below).

The dead white tree with arrows scratched into it - not easy to spot!
Follow the obvious path to the right of the tree. You’ll very quickly descend a short rocky section of track with the cliff walls on your right. You’ll see the path begin to head downhill to your left with a big boulder on the right side of the path.

The boulder by the cairn for the rock chimney
At this point you’ll feel like the correct path is to the right of the descent, past the large boulder, but it’s not. We went wrong here, as we initially followed the beaten down trail to the right.
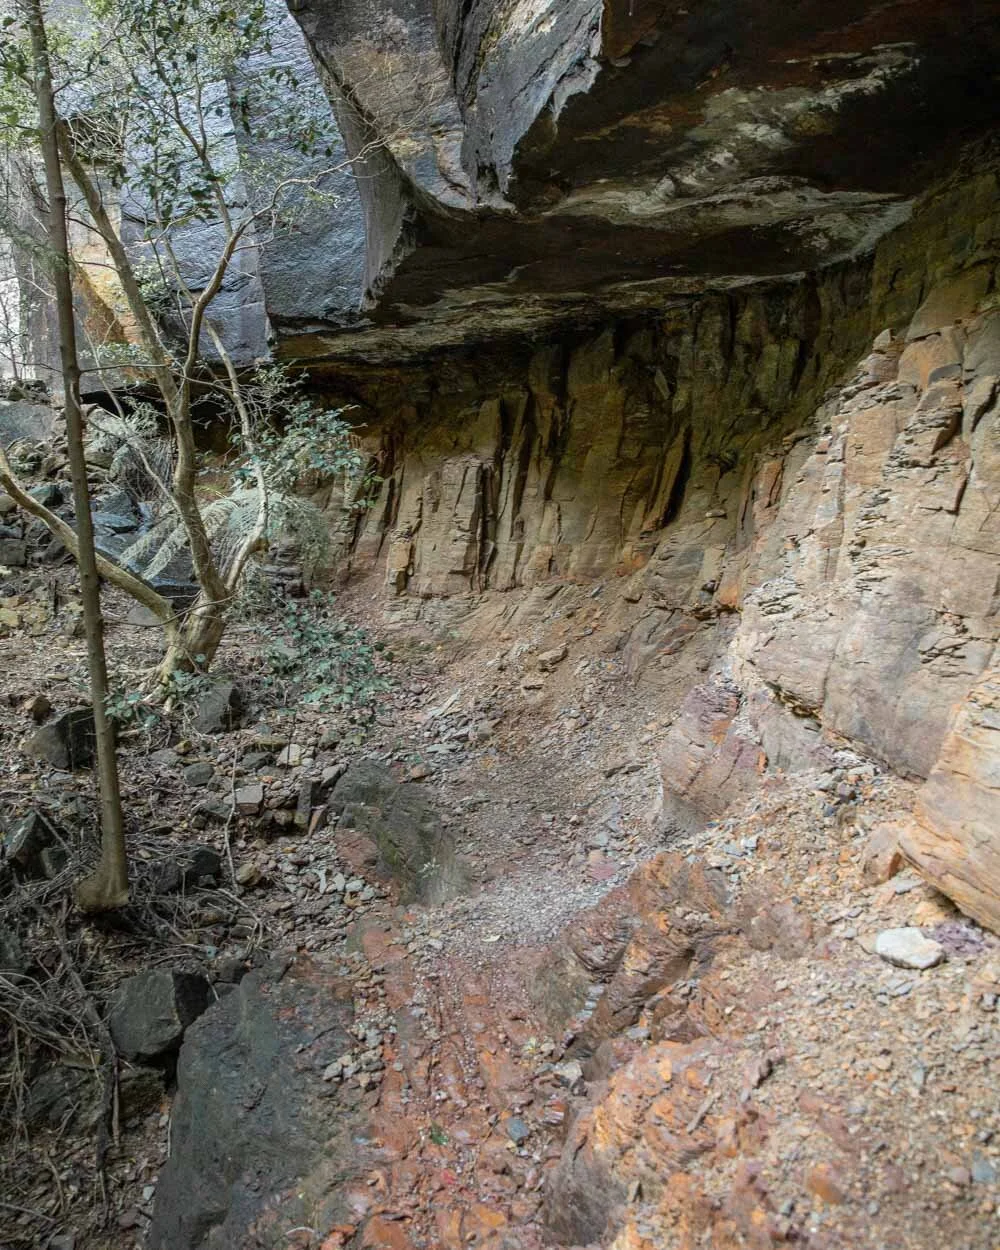
Have a look for a small cairn (badly photographed below) and you will find a hole for the rock chimney just a few feet from it (it’s behind a tree and on a rock ledge). Go carefully here because it is near a large drop.

The cairn showing the way to the rock chimney
Getting down the rock chimney
The rock chimney is one of the most famous parts of the trail and involves clambering through a hole and down a long narrow rocky slab, which has some natural footholds and gets you down to the next part of the track.
The narrow rocky slab you have to climb down is wedged between two cliffs which takes away the exposure. Some of the footholds are big and feel great, but some are smaller and feel less secure.

The rock chimney from below
Normally there is a fixed rope there, but when we visited it had gone. We actually meant to bring our own rope but forgot! If you think a rope will help you get down, then definitely bring your own just in case it is never replaced.
When I saw there was no rope I did have a moment of panic as I thought you had to use it to get down. Whilst you can definitely get down without, I do think having rope here would have given me peace of mind.

Footholds on the rock chimney

The rock chimney down
Everybody will feel differently about how easy or difficult the chimney is. Joe got down there in a minute with no trouble, whereas I needed a bit of help. Joe was at the bottom showing me where to put my feet next and that made it much easier. This was the only part of the walk that was out of my comfort zone. The rest is rough and not easy, but didn’t worry me too much.

The hole that marks the top of the chimney
I will admit to dreading the climb back up the chimney for the rest of the walk. Happily though it is so much easier getting up than down - I didn’t feel like I would slip which was my problem with the descent.
My advice would be, if you think you’re more of a me than a Joe, then go with someone who is confident and can give you a hand, and bring rope for that extra feeling of security!
The steep rocky descent
From the bottom of the chimney the path is obvious once more. The descent gets very steep and you follow the trail down a rocky gully - it’s the only route you can go!
This section is very rough, and there are some parts where you have to scramble, but it’s not too dissimilar to other scrambles on bush tracks.


You just have to keep an eye on footing because there is some exposure to the left at points and you don’t want to race down and career off the side of the track!
You will continue clambering over rocks on the descent for roughly 220m before you’ll head into the bush.

One of the steepest sections of scrambling
Through the bush
You’ll now have a very short period of respite on flat track, and it’s also a gorgeous patch of forest with plenty of lyrebirds and their myriad of calls.
Soon the navigation will become trickier because there are several paths, markers and ribbons which can take you the wrong way! We’ve done our best to give detailed instructions so that you don’t need the markers on the trail.

The key to this section is to follow the cliff, and try to stay no more than 20-30m away from it. If you think the trail is heading downwards and towards the creek, retrace your steps and try to stay near the cliff wall.
After 150m heading through the bush, you’ll come to a junction of sorts. There are arrows, ribbons and a cairn, all in opposing directions. Follow the cairn. Incase the cairn is removed, basically keep right, you want to keep close to the cliffs and away from the creek (you can still get to the falls by following the creek but it’s a longer route and involves much more slipper boulder scrambling).
You’ll soon come to an odd shaped tree - shown in the photo below. You may think this is hardly a landmark, but it does stand out!


From here, head uphill and you’ll pass a huge rock as you head towards the cliffs (this doesn’t look like the right path as it is steeper and not beaten down, but it is the right way) and you’ll soon come to a path that heads left and runs parallel to the cliff.


Follow it uphill for roughly 50m and you will come to a little boulder field.
The boulder section
Head over the boulders (they are small and not difficult to cross, just watch your footing) under a huge weeping wall for 40m. There’s a bit of yellow paint on the tree at the end of this bit.

You’ll then begin heading steeply downhill again and come to some more boulders. Keep right, sticking as close as makes sense to the cliffs. The track undulates a little but becomes pretty leisurely terrain-wise. You’ll hear the falls in the distance and know you’re on the home stretch.


The final steps
Roughly 300m after that final section of boulders you’ll see a glimpse of the falls through the foliage. It’s an amazing sight and you’re now just minutes away.
However, don’t be tempted to head down to the creek! Keep following the cliff all the way to the falls. The path takes you past the overhang for 100m before heading up some rocks to show you the pool and the waterfall in front of you.

Depending on water levels you’ll cool off instantly under the spray!

Funnily enough the only time I nearly fell over on the whole walk was climbing down the rocks to the waterfall because they were incredibly slippery. The path behind the waterfall was even slicker, but that was probably because there had been so much rain. Go super carefully here as a slip right at the end would be a nightmare.

At the bottom of Gerringong Falls
The reward for your efforts is spending time at one of the most gorgeous waterfalls in NSW. It really is spectacular and cascades into a perfect swimming hole at the base. If you’re keen to swim, then I’d recommend making sure you visit when the air temperature is reasonably warm.

The water will be cold all year round, but believe me if the air temperature is cool, it’s going to feel arctic in there. I did sort of wish when we visited that we’d gone a month or two earlier to really make the most of it.

There are heaps of rocks and boulders to sit and relax beside the falls and you’re probably hard pushed to find a better lunch spot!
Heading back up
In many ways getting back up to the trail is much easier than getting down. You know roughly the way back (although you will undoubtedly follow a slightly different path) and footing is more secure ascending than descending. It is a steep climb but it’s only around 1km when you know the way. I also think if you found the chimney difficult going down you’ll be pleasantly surprised by how much easier it is to get up.
The bike ride back has a little more uphill than the way there and your legs aren’t as fresh, but it’s not too bad (minus the sore bum if you’re not a regular rider!).
Then all that’s left to do is celebrate that you made it down to the bottom of such an incredible waterfall!
Getting to the trailhead
The whole adventure to Gerringong Falls starts on Budderoo Plateau Road, an unsealed fire trail near Barren Grounds in the Southern Highlands. There is a small area to park your car by the fence that stops vehicles going down Budderoo Plateau Road.
The start of the trail is 30 minutes from Kiama and 40 minutes from Wollongong.
Don’t have your own bike?
We don’t have our own bikes so rented them from Jeff at Wollongong based ‘Simple Cycles’. The bikes were really good quality and came with a puncture kit and water bladder. Jeff was super helpful and offered to drop the bikes off to us the night before because we wanted to make an early start. And incase this sounds like a sales pitch, it’s not! We paid full price : )
This post may contain affiliate links, meaning at no additional cost to you, that we will earn a small commission if you click through and decide to make a purchase. This helps towards the costs of running our website. Thanks for your support.